|
|
|
|
|
|
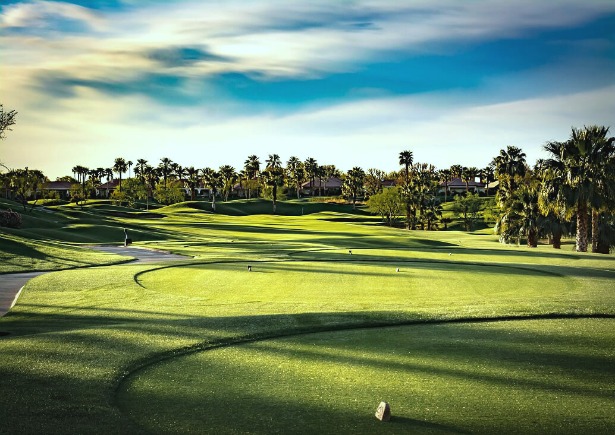 |
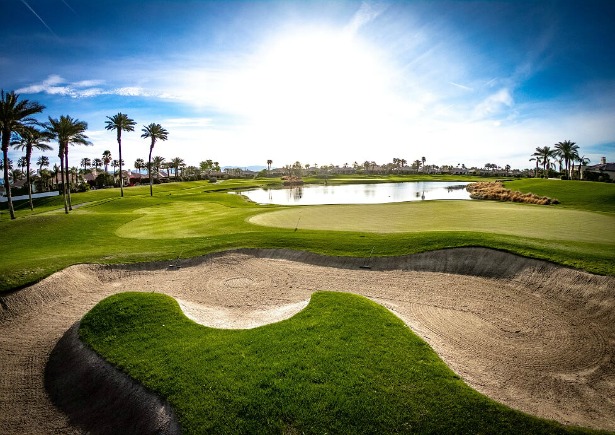
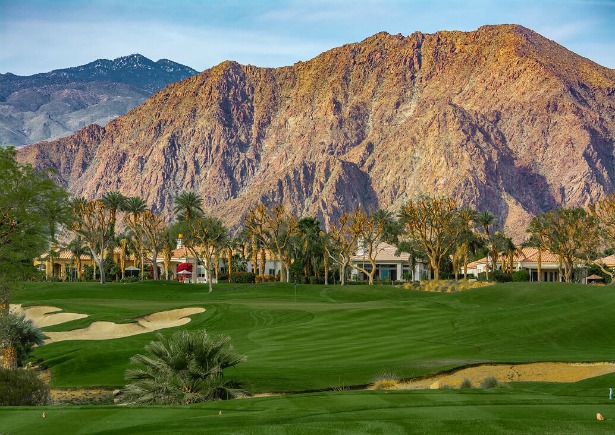
Hole #1
|
|
Par: 4 | Handicap: 17/17
|
|
377
345
312
291
275
|
HOLE DESCRIPTION:
An elevated set of tees presents a grand view of the seductively elegant opening hole. The best line here is just inside the fairway bunker down the left side of this generous fairway and away from the winding arroyo down the right side. Tee shots on the left half of the fairway will have the best angle onto the large subtle green protected front and back by deep grass swales.
|
|
|
 |
Hole #2
|
|
Par: 3 | Handicap: 15/15
|
|
170
170
146
125
119
|
HOLE DESCRIPTION:
This gem of a par three features a slightly elevated tee shot down to a beautifully contoured green surrounded by lush grass swales to help catch any wayward shots. A short accurate shot provides the average golfer an ample opportunity for a well - earned birdie.
|
|
|
 |
Hole #3
|
|
Par: 4 | Handicap: 1/1 |
|
438
420
390
350
326
|
HOLE DESCRIPTION:
The preferred line of play for this par four depends upon the pin location. If the pin is left, the tee shot must ascend the plateau on the left half of the fairway in order to avoid the bunker guarding the front of the green. Conversely, if the pin is on the right, the golfer must thread it inside the fairway bunker on the right in order to be rewarded with an unchallenged route to the hole.
|
|
|
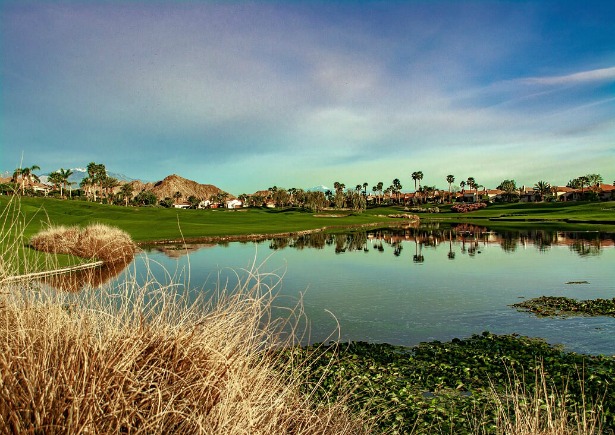 |
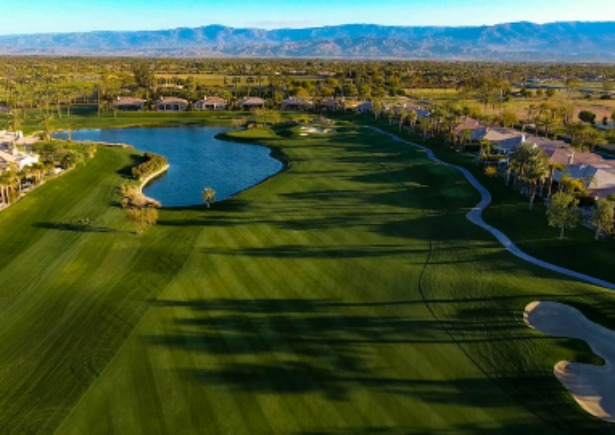
Hole #4
|
|
Par: 4 | Handicap: 7/11
|
|
409
368
343
307
289
|
HOLE DESCRIPTION:
This is a classic risk/reward golf hole that taunts the player to carry as much of the lake as possible in order to have the shortest distance to the well - guarded green. Meek play away from the water will result in a very difficult second shot.
|
|
|
 |
Hole #5
|
|
Par: 5 | Handicap: 9/7
|
|
582
559
509
446
437
|
HOLE DESCRIPTION:
Feel free to pull out the driver and let the reigns out on this lengthy par five with a generous fairway. Care must be taken on the second shot as water guards the entire left side of the second landing area and green. Miss the green and face an unenviable flop shot over a large mound.
|
|
|
 |
Hole #6
|
|
Par: 3 | Handicap: 11/13
|
|
175
155
144
129
120
|
HOLE DESCRIPTION:
Nestled between the water and a cavernous bunker, this undulating green doesn’t necessarily mean an easy par if hit in regulation. The green features a variety of pin placements that present a challenging two - putt if your shot doesn’t find the correct location.
|
|
|
 |
Hole #7
|
|
Par: 5 | Handicap: 13/5
|
|
545
524
492
435
409
|
HOLE DESCRIPTION:
This dramatic par five presents the bold player with a chance to get home in two by challenging a nest of bunkers and arroyo on the inside of the dogleg. For those who can’t carry these bunkers, a wide stretch of fairway up the left side of the hole provides an unchallenged line to the small undulating green guarded on all three sides by deep pot bunkers and grass depressions.
|
|
|
 |
Hole #8
|
|
Par: 4 | Handicap: 5/9
|
|
435
413
393
352
320
|
HOLE DESCRIPTION:
Players successfully carrying the serpentine arroyo running along the right side of the fairway will have the best angle to the large green protected by a bunker so deep that simply getting out of it would be a great shot. Shots hit in the low area on the left side of the fairway will have a partially obscured view of the green and have to contend with the treacherous greenside bunker.
|
|
|
 |
Hole #9
|
|
Par: 4 | Handicap: 3/3
|
|
457
434
401
361
335
|
HOLE DESCRIPTION:
The ninth hole is a picturesque par four that stretches a quarter mile from the tips between two large fairway bunkers that sit perched above a saddled fairway. The green site is a complex array of different pin positions, deep bunkers, grass swales and depressions. The best way to reach the flag when it is tucked behind the bunker on the right side is a cut shot to the middle of the green, whereupon the ball will feed to the lower pin location.
|
|
|
 |
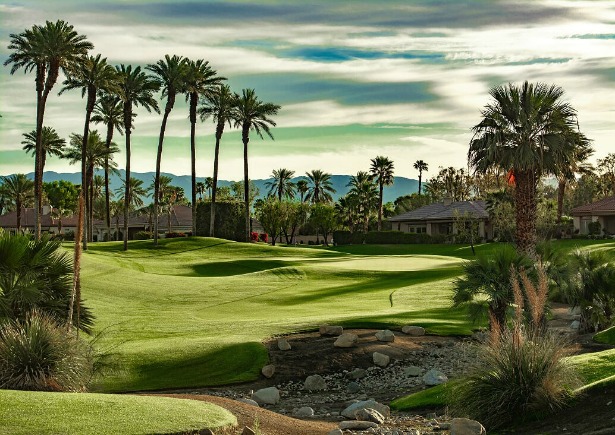
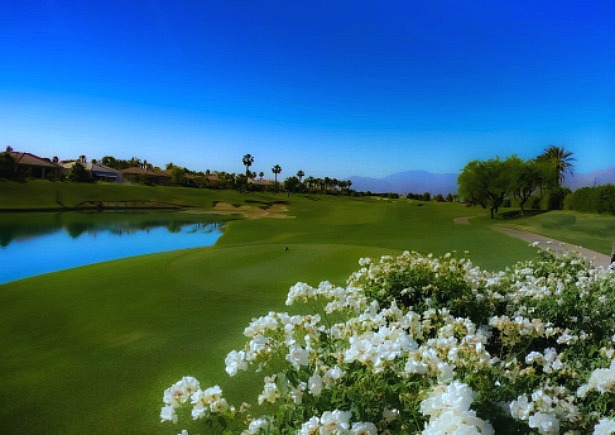
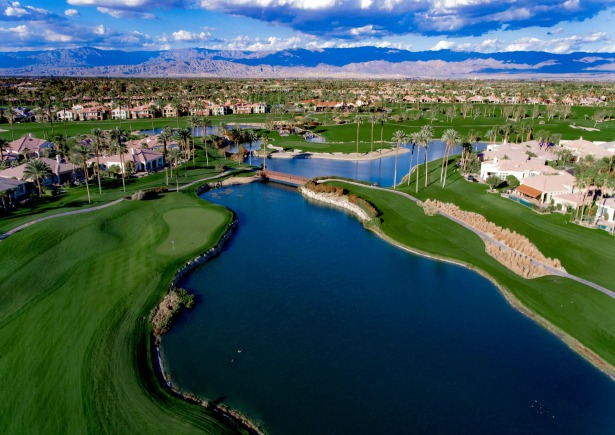
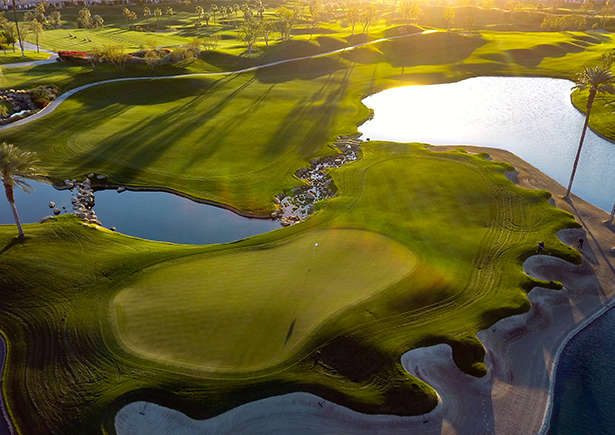
Signature Hole #10
|
|
Par: 4 | Handicap: 4/8
|
|
434
401
364
320
297
|
HOLE DESCRIPTION:
Standing on the tee after making the turn to the back side,
you do not see what the tenth hole will offer once you hit your tee shot. With
a beautiful stream running down the left side and bunkers to the right, you
want to make sure that you're in the fairway. As you make your way to the
fairway, the hole opens up and you look down to see the green framed by water
left, sand bunker right and palm trees surrounding the back, only to highlight
the San Jacinto Mountain range in the backdrop. Look for our Signature Plaque
situated on the fairway. Water abounds down the entire left side of this
sweeping downhill par four. Players will face a challenging second shot over
water and a deep grass swale to the right of the green for those who bail too
far right.
|
|
|
 |
Hole #11
|
|
Par: 5 | Handicap: 16/4
|
|
567
541
506
451
421
|
HOLE DESCRIPTION:
Unreachable by even the longest of hitters, this three shot par five is one of the most beautiful bunkered holes on the property. The best chance at birdie will be found by avoiding playing down the right side of this hole.
|
|
|
 |
Hole #12
|
|
Par: 3 | Handicap: 18/18
|
|
183
173
157
143
126
|
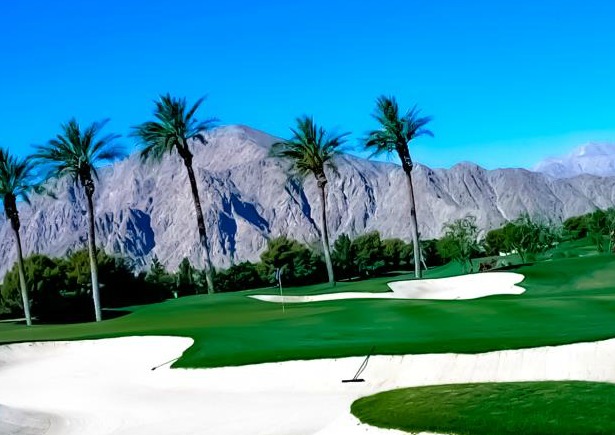
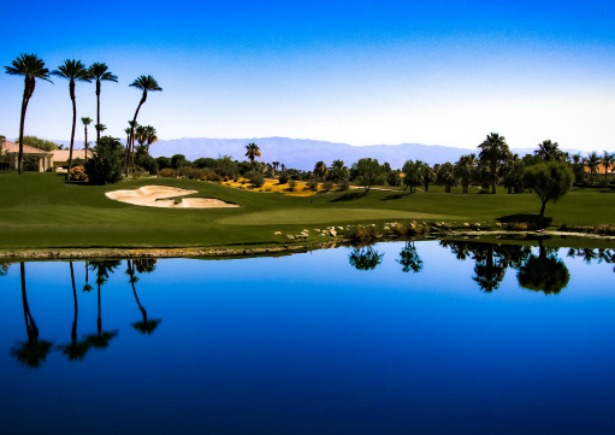
HOLE DESCRIPTION:
This dramatic downhill par three features a punch - bowl type green location that is protected on both the left and right sides by a swarm of deep bunkers. The most challenging shot on this hole is to the narrow back right pin position that will punish anything but the most perfect of shots.
|
|
|
 |
Hole #13
|
|
Par: 4 | Handicap: 8/12
|
|
412
383
348
322
302
|
HOLE DESCRIPTION:
Playing towards the North, this challenging but fun par 4 is guarded by water down the entire right side. A mid - iron can reach the large putting surface that is nestled alongside large boulders. Bailing left of the green is the smart play to keep your ball dry.
|
|
|
 |
Hole #14
|
|
Par: 4 | Handicap: 10/14
|
|
436
412
378
333
312
|
HOLE DESCRIPTION:
Number fourteen is another wide, saddle - type fairway that invites you to unleash the driver to make it onto this large, undulating green protected by an array of large bunkers. Check out the Palmer Tee located behind thirteen green which adds another forty yards to this uphill par four.
|
|
|
 |
Hole #15
|
|
Par: 4 | Handicap: 6/16
|
|
412
397
367
324
307
|
HOLE DESCRIPTION:
A heroic opportunity awaits the player on this classic “Cape” type golf hole. Tee shots carrying the cross - bunker at the lake edge will be kicked forward another 20 - yards on the down slope to set up a short iron and great chance at birdie. Caution must be exercised with the second shot as water lurks deceptively close to the green.
|
|
|
 |
Hole #16
|
|
Par: 4 | Handicap: 2/6
|
|
471
442
413
368
333
|
HOLE DESCRIPTION:
Number sixteen is the start of one of the most difficult finishing holes in the Coachella Valley. The ideal line of play is along the left side of the fairway, carrying the canyon - like arroyo that guards the entire left side of this strategic par four. Players finding the right side of the fairway will have a little or no view of the green which is nestled between two large ridges and tucked behind a nest of pot bunkers.
|
|
|
 |
Hole #17
|
|
Par: 3 | Handicap: 12/10
|
|
222
204
177
170
152
|
HOLE DESCRIPTION:
This stunning uphill par three was designed to feed a solid long iron or wood shot hit up the right side onto the large, multi - tiered putting surface. Firing at a back left pin here is strongly discouraged because of the relative narrowness of the green and the monstrous bunker that protects the front and left.
|
|
|
 |
Signature Hole #18
|
|
Par: 5 | Handicap: 14/2
|
|
543
514
467
438
417
|
HOLE DESCRIPTION:
The finishing hole at Mountain View Country Club embodies everything that is great about Arnold Palmer and this outstanding golf course: beauty, strategy, drama and the opportunity for the bold player to score well. A two - tiered fairway forces the player to make a decision off the tee.
After finishing the tough 17th par 3, you make the turn to
come back to the Clubhouse looking for a little relief, only to have a fabulous
par 5 finishing hole with more options than Dutch Bros Coffee House. With a
split fairway giving you the option to shorten the hole on narrow left side or
go high right to the wider fairway. After reaching your ball you find yourself
staring into the King's throne, where there is a large body of water in front
and to the left then covered by a beach that rivals Huntington, a small section
of fairway along the bountiful creek that runs through the middle of the hole, but
don't fret as there is a large fairway to bail to on the right. Here you will
find our Signature Plaque. You will get to finish the hole with a large green
surrounded by beautiful waterfalls.
|
|
|
|
|
|
|
|
|